
Follow the steps below to manually connect to eduroam network. You may also download the instructions here.
Note: Eduroam login requires your complete email address, username@eee.upd.edu.ph, and your password regardless of the type of device or its operating system. Images may differ from your local environment, but the process is the same.
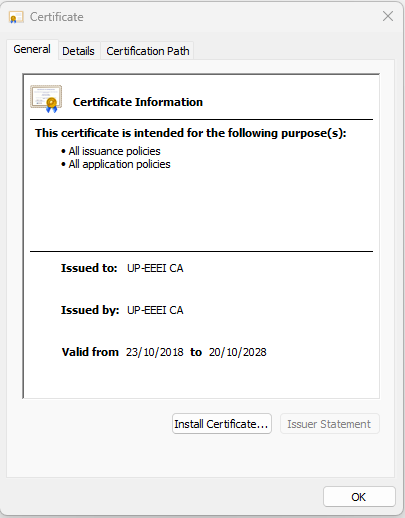
I.) Install EEEI-CA.
- Download the certificate EEEI-CA.
- Open the file and Install the Certificate.
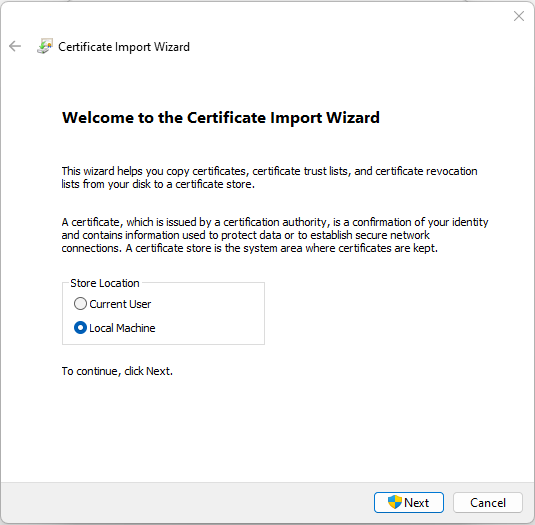
- Install the certificate on the Local Machine.
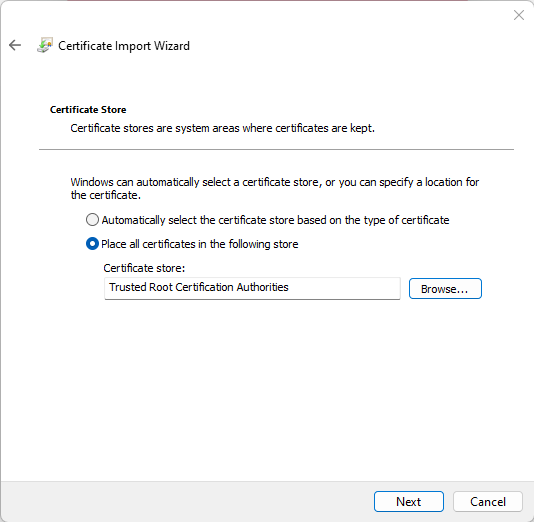
- Install it as a Trusted Root Certificate Authority.
- Press Finish to confirm certificate installation.

II.) Setup Network Connection.
- For Windows 10, go to Network and Internet > Network and Sharing Center.

- Select “Set up a new connection or network”
- Select “Manually connect to a wireless network”
- Click Next then Change connection settings.

- On the Security tab, match the configuration below:

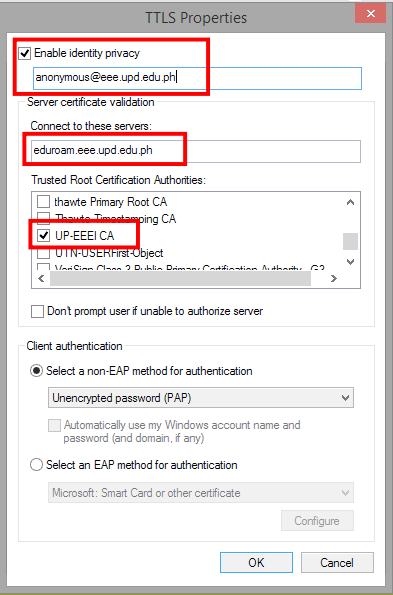
- Go to Settings. Enter anonymous identity, eduroam server, and verify it against UP-EEEI CA.
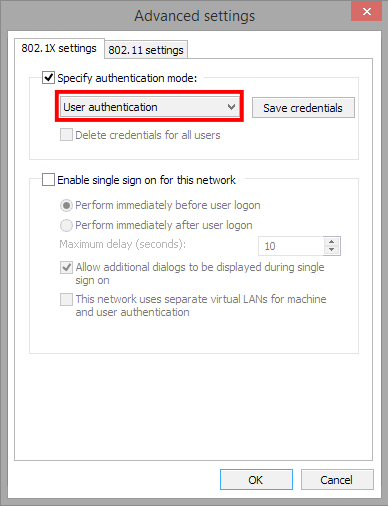
- Go to Advanced settings and tick Specify authentication mode then select User authentication.
- Press Ok to finish.
- Navigate to the available Wi-Fi networks and connet to eduroam.
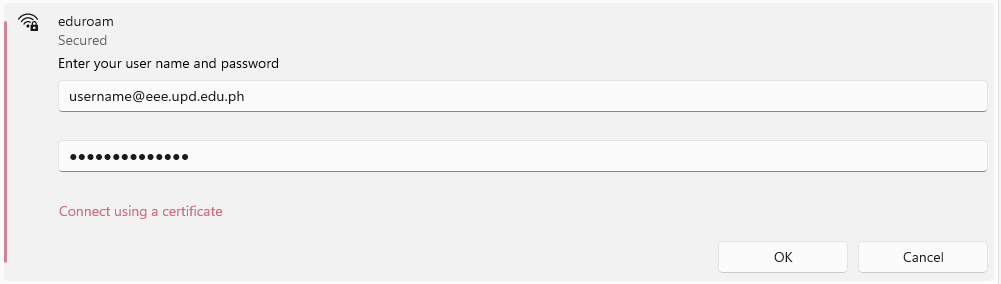
- Enter your EEE account with your password
- You will be connected to the eduroam network when the authentication succeeds.
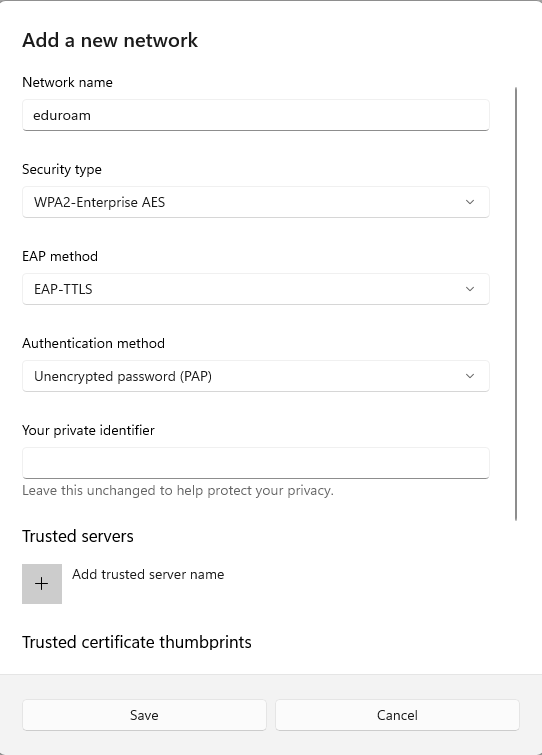
- For Windows 11, go to Network and internet > Wi-Fi > Manage known networks.
- Select Add network.
- After saving the added network, navigate to the available Wi-Fi Networks and connect to eduroam.
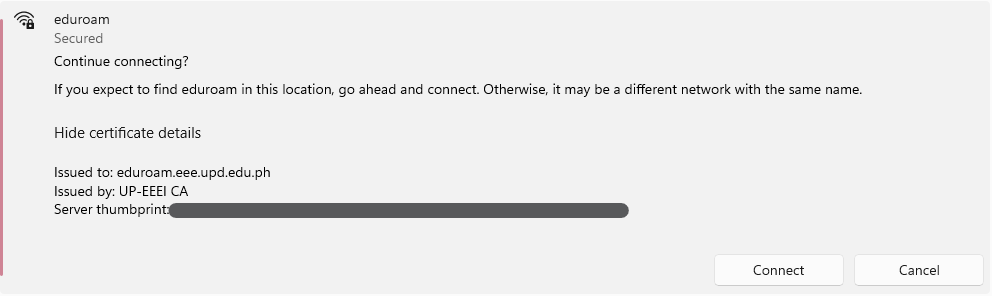
- Enter your EEE account credentials and confirm that you are connecting using the certificate issued to eduroam.eee.upd.edu.ph
- Select Add network.
For any concerns regarding eduroam, please email support@eee.upd.edu.ph